StarTech.com USB 3.1 Dual-Bay Dock for 2.5"/3.5" SATA SSDs/HDDs User Manual
Quick start guide, Packaging contents, System requirements
Quick start guide
DE:
Bedienungsanleitung - de.startech.com
FR:
Guide de l'utilisateur - fr.startech.com
ES:
Guía del usuario - es.startech.com
IT:
Guida per l'uso - it.startech.com
NL:
Gebruiksaanwijzing - nl.startech.com
PT:
Guia do usuário - pt.startech.com
Manual Revision: 04/22/2015
For the latest information, technical specifications, and support for
this product, please visit
www.startech.com/SDOCK2U313
.
Packaging contents
• 1 x USB 3.1 to dual 2.5 in. or 3.5 in. hard drive docking station
• 1 x USB 3.1 cable
• 1 x Universal power adapter (NA/UK/EU/AUS)
• 1 x Instruction manual
System requirements
• USB-enabled computer system with an available USB port
• 2.5 in. or 3.5 in. SATA drive
Note:
To obtain the maximum USB throughput, you must use a
computer with a USB 3.1 Gen 2 port.
Supported operating systems are subject to change. For the latest
requirements, please visit
www.startech.com/SDOCK2U313
.
SDOCK2U313
USB 3.1 (10 Gbps) dual-bay dock for SATA drives
*actual product may vary from photos
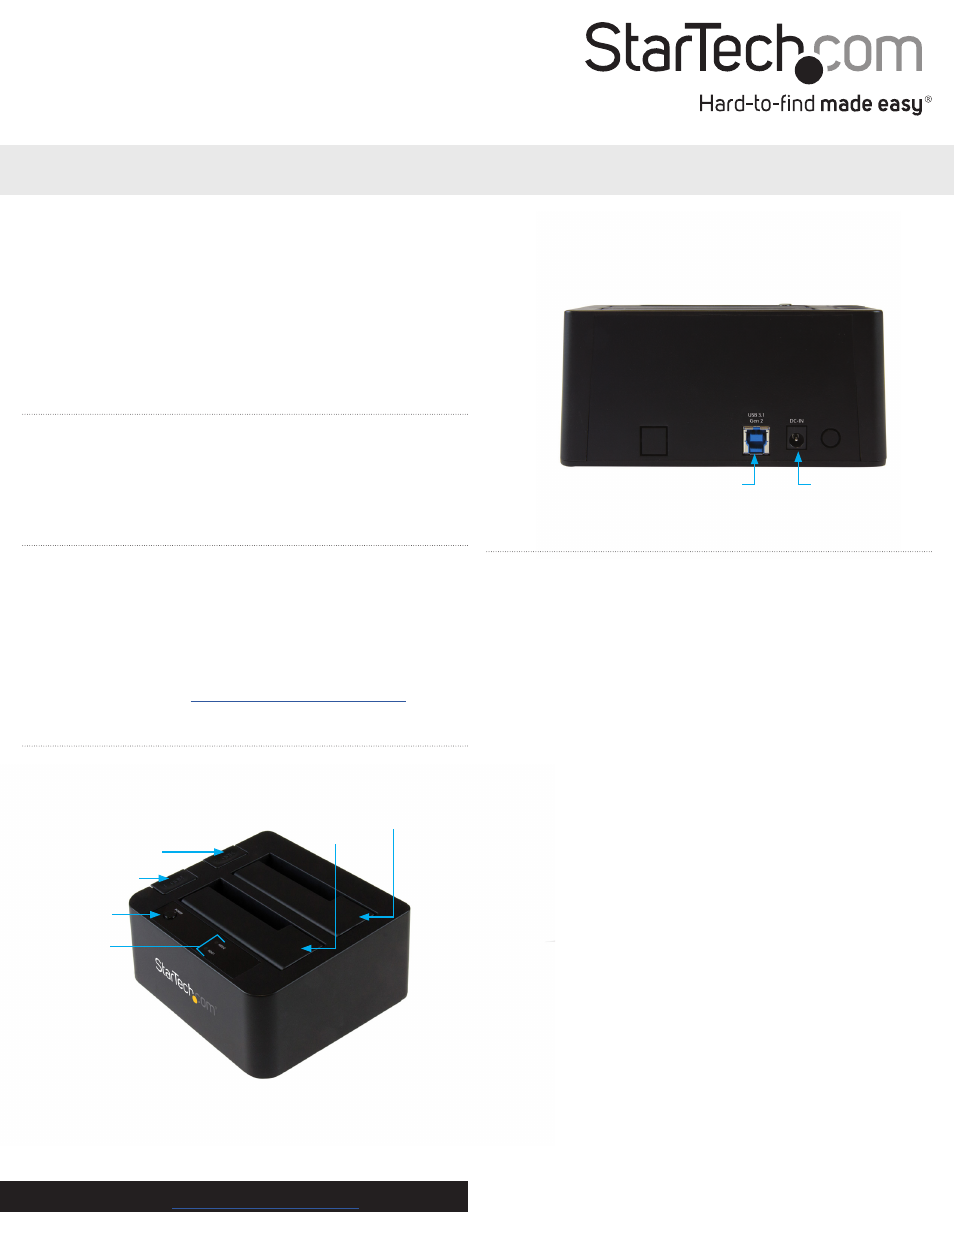
Product overview
Front view
Power button
Power and
activity LED
HDD1 Eject button
HDD2 Eject button
HDD1 slot
HDD2 slot
Rear view
USB 3.1 port
Power adapter port
Connect the docking station
Warning!
Hard drives and storage enclosures should be handled
carefully, especially when they’re transported. If you’re not careful
with your drives, you may lose data as a result. Always handle
storage devices with caution. Make sure that you’re properly
grounded by wearing an anti-static strap when you install any
computer component. If an anti-static strap isn’t available, touch a
large grounded metal surface (for example, the computer case) for
several seconds to discharge any built-up static electricity.
1. Connect the external power adapter from the docking station to a
power outlet.
2. Press the
Power
button to turn on the docking station.
3. Connect the included USB 3.1 cable from the docking station to
an available USB port on the computer system. Your computer
can either be turned on or turned off when you connect the USB
cable.
Install a hard drive
1. Carefully align a 2.5 in. or 3.5 in. SATA drive with an HDD slot on
the docking station, so that the SATA power and data connectors
on the drive are aligned with the corresponding connectors inside
of the HDD slot.
2. Insert the 2.5 in. or 3.5 in. SATA drive into an HDD slot.
3. Press the
Power
button to turn on the docking station.
4. After the hard drive is installed and the docking station is turned
on, your computer automatically recognizes the hard drive and it’s
accessible as though the hard drive were installed internally in the
system.
Note:
If your computer doesn’t automatically recognize the drive,
it’s likely that your hard drive wasn’t initialized or it was formatted
incorrectly.
Installation