2 installation – Measurement Computing PCM-DAS08 User Manual
Page 6
2 INSTALLATION
2.1 SOFTWARE INSTALLATION
Before you open your computer and install the board, install and run InstaCal™, the
installation, calibration and test utility included with your board. Refer to the
Extended Software Installation manual for InstaCal™ installation instructions.
2.2 HARDWARE INSTALLATION
Your PCM card is completely plug and play. There are no switches or jumpers to set
prior to installation in your computer. Configuration is controlled by your systems’
PCMCIA Card and Socket Services. Simply insert the PCM-DAS08 into any
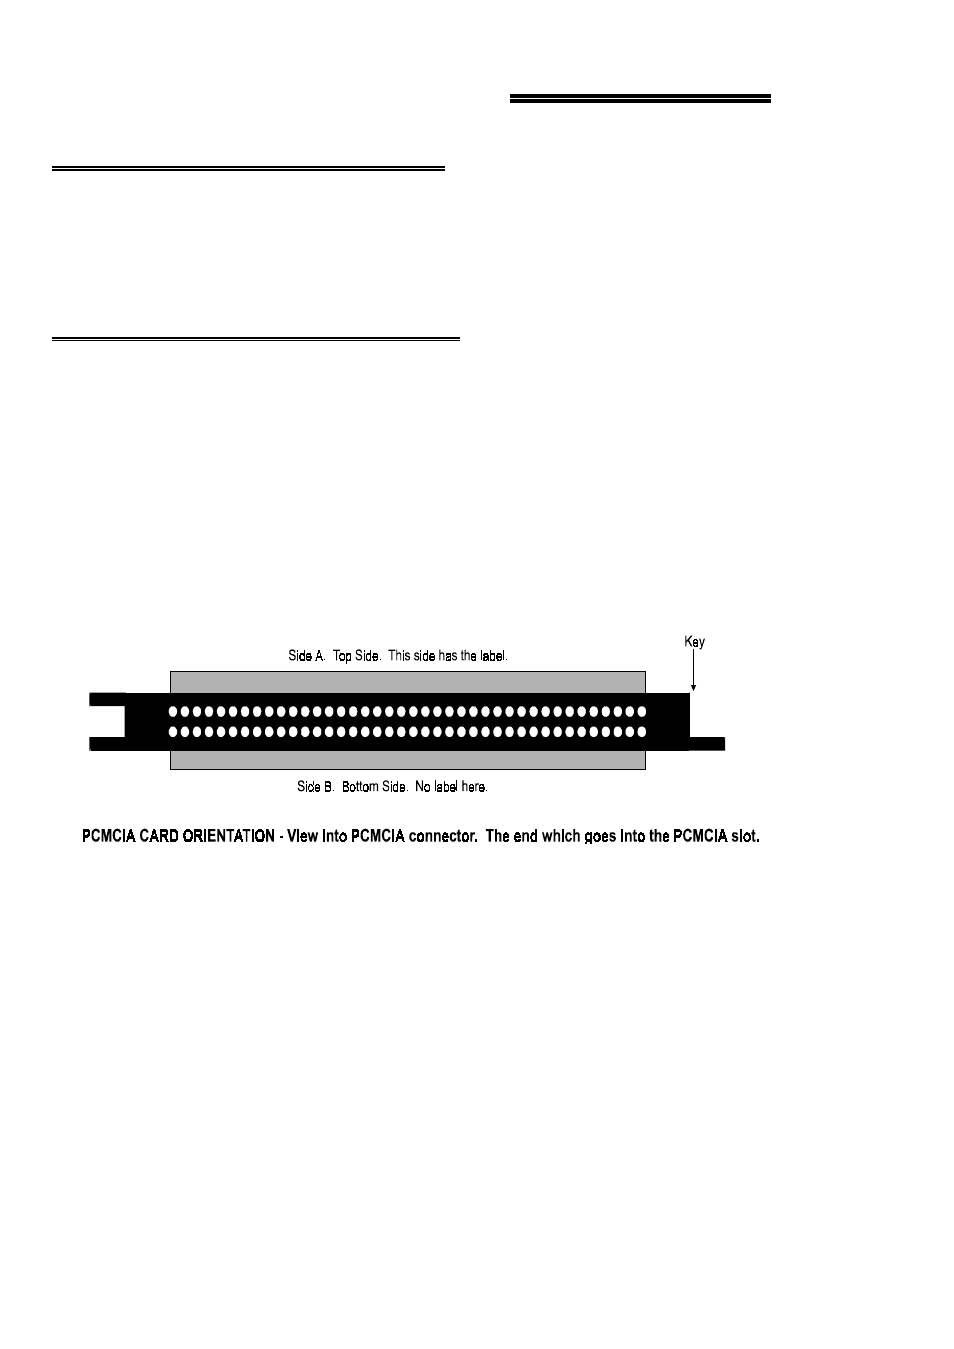
available PCM slot. Refer to the orientation guide below for proper orientation of the
card (the typical system orients the card with the label up).
Shown here is a PCM card case looking into the connector which is inserted
into the PCMCIA slot of your computer. The KEY helps to insure that the
PCM board is inserted in the correct orientation.
Figure 2-1. PCMCIA Connector
If you are using an operating system with support for Plug and Play (such as Windows
95 or 98), a dialog box will pop up upon insertion of the card indicating that new
hardware has been detected. If the information file for this board is not already loaded
onto your PC, you will be prompted for a disk containing it. The InstaCal software
that was supplied with your board contains this file. Just insert the disk or CD and
click OK.
In order to easily test your installation, it is recommended that you install InstaCal, the
installation, calibration and test utility that was supplied with your board. Refer to the
Extended Software Installation Manual for information on the initial setup, loading,
and installation of InstaCal and optional Universal Library software.
2