DNF Controls Tally Manager User Manual
Page 10
Page 10 of 16
5.
Configure Switcher Inputs Table
1) Launch your web browser and enter the Device Controller’s IP address. The DC Home
Page is displayed.
2) Click on the “Protocol Assignment” link at the top of the page. The Protocol
Assignment Table is displayed.
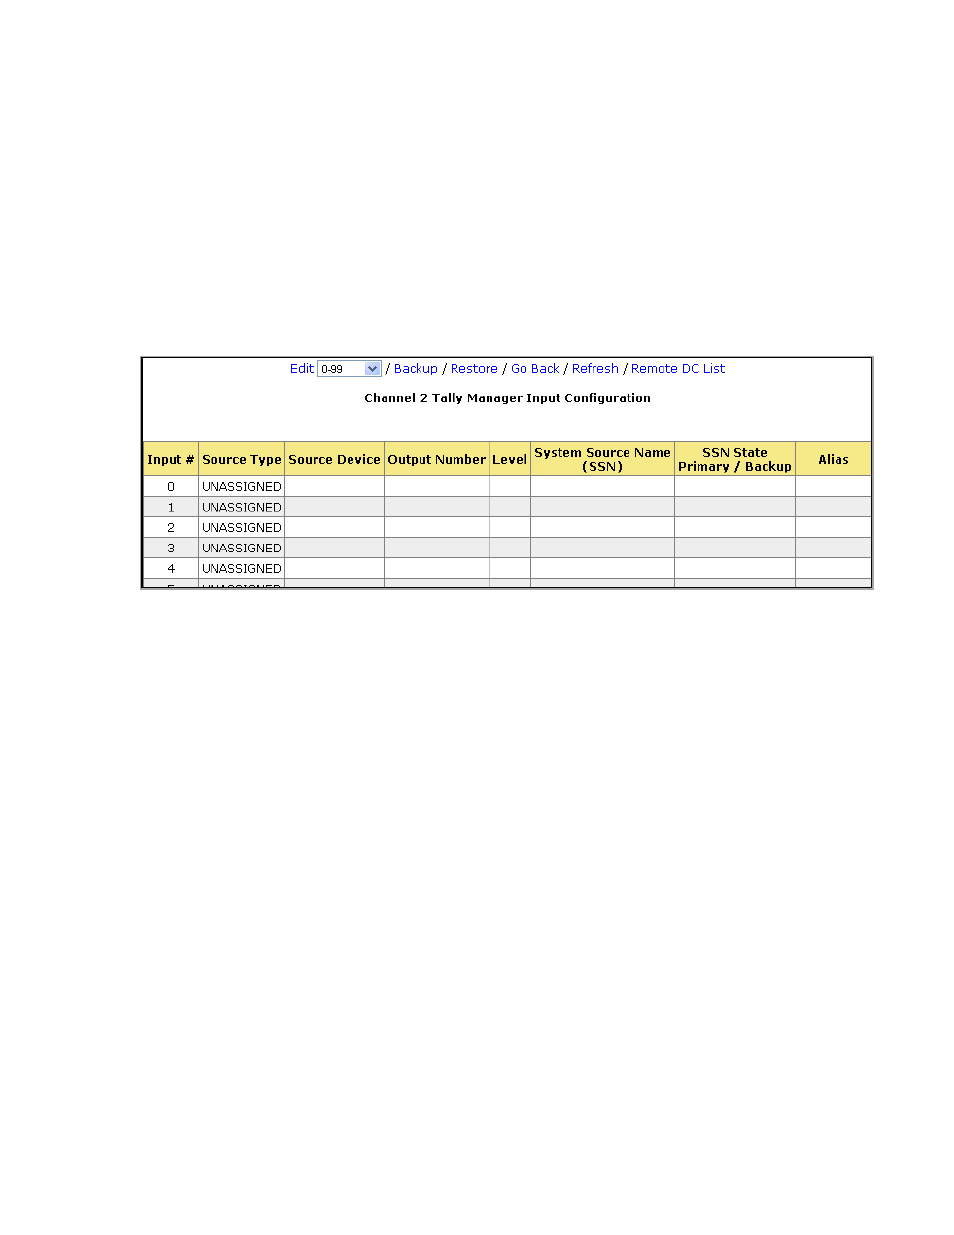
3) On the Protocol Assignment Table, on the Switcher Channel row, in the “Tally
Manager Config” column, click on the “Inputs” link. The Switcher Inputs web page is
displayed.
4) From the drop down menu displayed at the top of the Switcher Inputs web page,
select the range of Inputs to be configured.
5) Click the “Edit” link near the top of the Router Inputs web page.
6) For each Input, under the Source Type column, select “Unassigned”, “Fixed” or
“Dynamic.” Typically, “Dynamic” is selected for switcher inputs.
Fixed – Video source originates on this device.
Dynamic – Video source originates on another device.
7) If Fixed is selected, enter the System Source Name (SSN) for that Input. In the Alias
column, select the Alias mode for that Input from the drop down menu.
i. Disabled – No alias is allowed. Only the System Source Name will be
displayed on the UMD.
ii. Local – A local alias may be assigned to this Input on a monitor wall
that displays this Input. The alias will only affect the monitor wall
where it is configured.
iii. Global – A global alias may be assigned to this Input at the router. The
alias will affect all monitor walls that display this Input.
iv. Local Overrides Global – Local and global aliases may be assigned to
this Input. If a Local alias is assigned, it will override a Global alias
that has been assigned.
- 2034CL-N
- 4000CL-O V3.1
- 4000CL-O V3.1
- 4000CL-O V3.1
- 4000CL-O V3.1
- 4000CL-O V3.1
- 4000CL-O V3.1
- 4000CL-O V3.1
- 4000CL-O V3.1
- 2034CL-O vs.3.1
- 4000CL-O V3.1
- 4000CL-O V3.1
- 2034CL-N-PBIO
- 2034CL-TO
- 4000CL-Q
- 4000CL-Q
- 2034CL-TO-PBIO
- 2034CL-SX-PBIO
- 4000CL-SX
- 4000CL-SX
- 2034CL-MAV
- 2034CL-MAV-PBIO
- 2034CL-L Vs.3.0
- 2034CL-L-PBIO VS.3.0
- 2044CL-L-8
- 2044CL-L-8
- 2044CL-L-8
- 2044CL-L-8
- 2044CL-L-8
- 4040CL_(-A, -L, -O, -NX, -7, -8, -T, -P)
- 2044CL-L-8
- 4040CL_(-A, -L, -O, -NX, -7, -8, -T, -P)
- 2MCE
- 2MCE
- 3040P-L_&_3040P-L-LT
- 3040P-L_&_3040P-L-LT
- 3040P-L_&_3040P-L-LT
- 4000CL-LPH
- 3040P-DLO-L
- 4000CL-L-KBIO Vs.3.0
- 4000CL-L-KBIO Vs.3.0
- 4000CL-L-KBIO Vs.3.0
- 4000CL-MAV70
- 4000CL-N
- 4000CL-MAV
- 4000CL-TO
- 4000CL-AX
- 4040CL-EVS-PBIO
- 4040CL-EVS-PBIO
- Analyst, RS422/RS232 Tester
- Analyst, RS422/RS232 Tester with (LOG 2) VTR Data Logging Option
- Analyst, RS422/RS232 Tester with (LOG 2) VTR Data Logging Option
- USP3-SBX-VSS
- ST100-CP
- AnyWhere Interface Switch
- ST420-CP
- ST300-CP
- GTP-32
- ST400-CP
- PBUS G and V Command Addendum
- CP20
- DC21
- DMAT-O-22
- DMAT-EZ
- DMAT-EZ
- DMAT-DL
- DMAT-MAV
- DMAT-O-42
- GC-32 GPIO Controller
- GTP-32BP Installation
- GTP-32BP Installation
- DMAT-AB
- SR6-SONY
- SR6-SONY Expander
- ST100
- ST100_UVW
- ST100 Shuttle Box
- ST200-S-RCP
- ST200-S-TBL
- ST30
- ST304-DSR1K
- ST304-SXD
- ST300-DSR1K
- ST304-SRP
- ST304-DSR1K
- ST304-DSR1K-PBIO
- ST300-SSM-AUTOEDIT
- ST304-DSR1K
- ST304-DSR1K-PBIO
- ST304-DSR1K-PBIO
- ST304-Edit
- ST420-EVS
- ST304-DSR1K-HL
- ST420-PTV
- ST420-VSS
- ST60-DVC
- ST60-S
- ST60-S
- SW1X8
- SW2X1
- SW32PS_Port_Switcher
- SW32PS-RCP
- TBC-2-DVC
- TBC-2
- UABS-I Operation_Manual
- UABS-I Installation_Manual
- USP-RDC
- Universal Switch Panel (USP-8, USP-8D, & USP-16)
- USP-S