Chapter 2 setup notes and system testing, Hardware setup notes – Measurement Computing WaveBook rev.3.0 User Manual
Page 23
WaveBook User’s Manual
6-23-99
WaveBook Setup 2-1
Setup Notes and System Testing
2
Hardware Setup Notes …… 2-1
WBK20A – PCMCIA/EPP Interface Card (for linking WaveBook to a Notebook PC) …… 2-1
WBK21 – ISA/EPP Interface Card (for linking WaveBook to a Desktop PC) …… 2-2
Optional Printer Connection ……2-4
Analog-Signal Connections & Grounds ……2-4
Digital I/O Connection (WaveBook/512 and /512H) ……2-5
Digital I/O Connection (WaveBook/516 Series Only) ……2-5
Pulse Trigger Connection (WaveBook/516 Series Only) ……2-6
System Testing …… 2-6
This chapter is intended primarily for users having systems that are beyond the scope of the Quick Start (presented at
the beginning of this manual).
Reference Note: For more advanced system setups, you should refer to the following, as needed.
• Chapter 3 – discusses WBK expansion options.
• Chapter 4 – pertains to system power use and mechanical assembly options.
• If using the WBK20A or WBK21, refer to separate instructions, supplied with that device.
Hardware Setup Notes
If you are connecting your WaveBook to a Notebook PC, you will be using a WBK20A, PCMCIA Interface
Card. If connecting WaveBook to a desktop PC, you will use a WBK21 ISA/EPP Interface Card. Both
interface types are detailed in the following text.
WARNING
WARNING
WARNING
WARNING
Electrical Shock Hazard! Perform all hardware setups with all power off to the device serviced
and to all connected equipment; otherwise, personal injury may result.
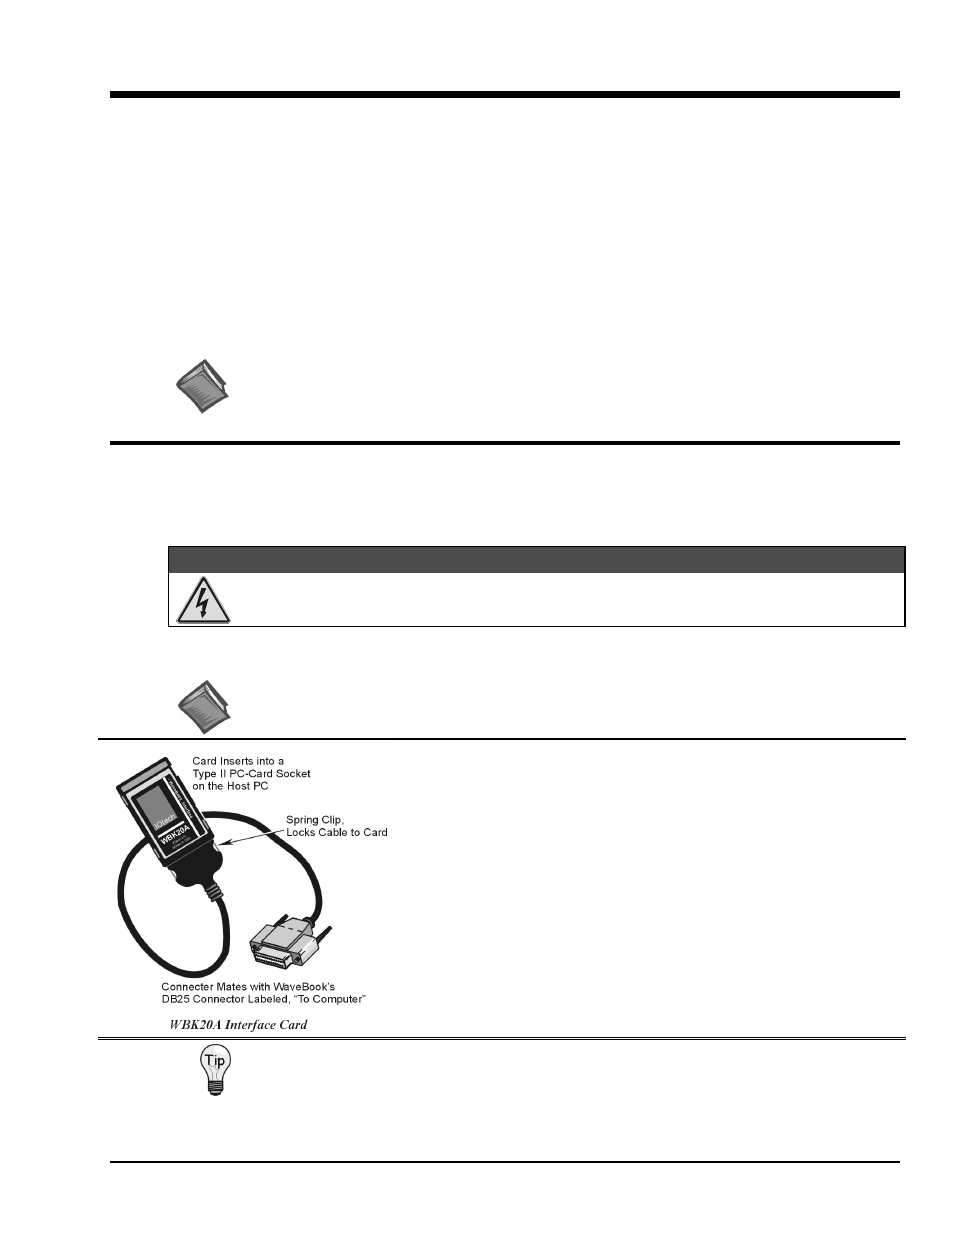
WBK20A - PCMCIA/EPP Interface Card
(for linking WaveBook to a Notebook PC)
Reference Note:
WBK20A is shipped with a PC-Card-to-Parallel-Port Adapters User’s Manual.
Refer to that document for installation details.
To link a WaveBook to a Notebook PC using a WBK20A:
1. Insert the WBK20A card into a Type II PCMCIA socket on the Notebook.
2. Connect cable (CA-191-1) to the PCMCIA card.
3. Connect the cable’s DB-25 socket-connector to WaveBook's DB25 plug
connector labeled “TO COMPUTER.”
4. Load the required software drivers by following the instructions provided
with the WBK20A.
Note that no hardware configuration is required. Software configuration is
performed from within the provided software.
Record the WBK20A DMA address and IRQ interrupt settings for future reference.