Audio / tc menu, V-raptor™ 8k v v operation guide – RED DIGITAL CINEMA V-RAPTOR 8K VV DSMC3 Camera (RF, Black) User Manual
Page 89
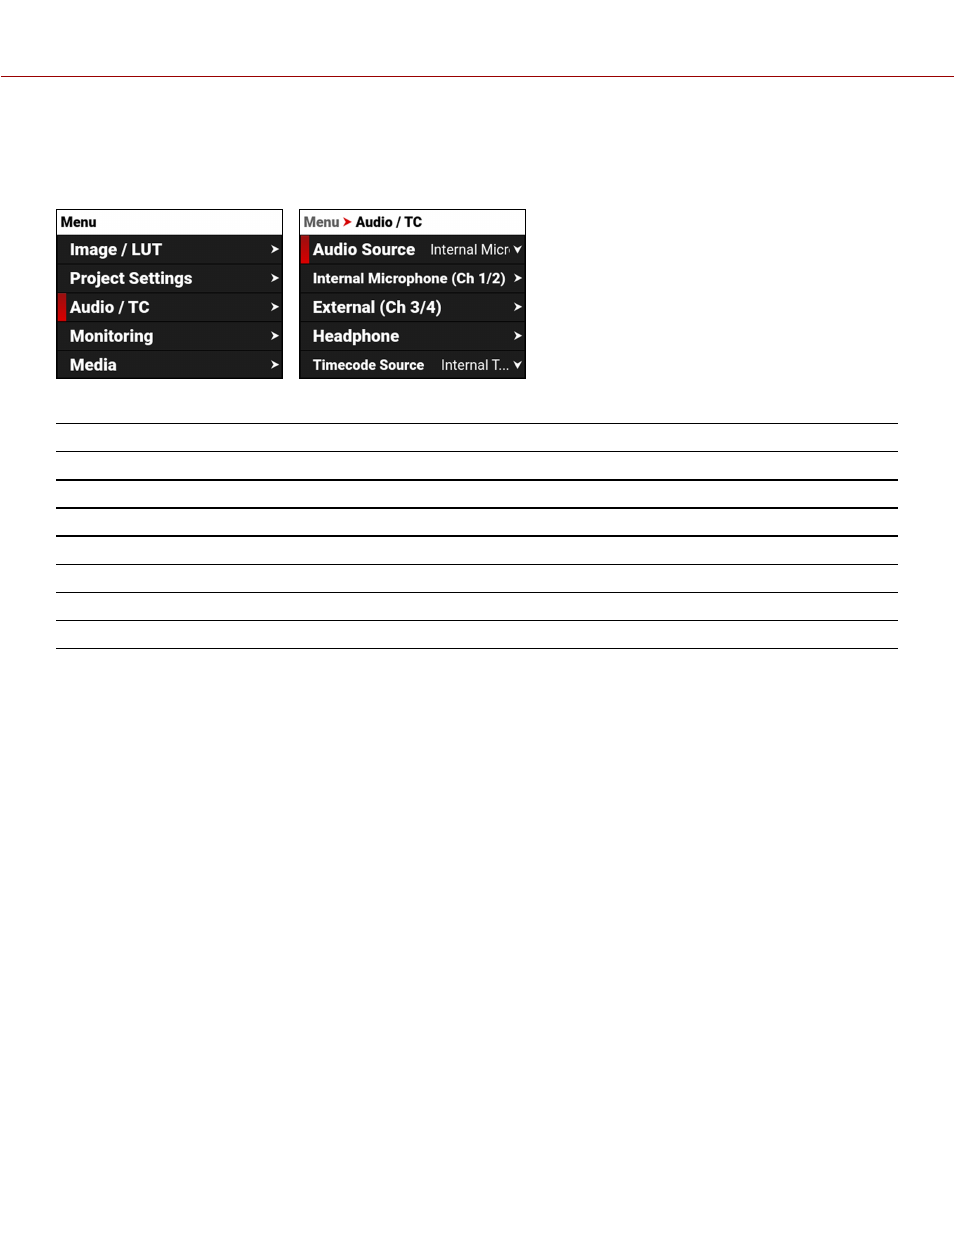
AUDIO / TC MENU
The Audio / TC menu contains the settings you use to configure your camera audio and Timecode.
From the camera LCD menu, navigate to Audio / TC and press SEL:
Use the Audio / TC menu to configure the audio and Timecode settings for the camera:
ITEM
DETAILS
Audio input source
Left and Right internal microphone levels
Left and Right external audio levels
Headphone volume level
Timecode source
Jam Timecode to TOD
Button to Jam Timecode to Time of Day (TOD)
Timecode to display
AUDIO DETAILS
The camera is equipped with two integrated microphones suitable for scratch-track audio (Ch 1 and 2), and it is
equipped with a 5-pin XLR audio connector that accepts 2-channel audio, Line, Mic, and +48V Phantom Power for
external audio (Ch 3 and 4).
You can link the gain for the two internal and external channels together. This allows you to adjust the two internal (or
external) channels together as one.
You can record audio from the internal microphones, from the external audio connector (2-channel recording), or from
internal and external sources combined as 24-bit 48 kHz uncompressed audio tracks.
You can adjust the external audio by using the appropriate camera gain-settings (-52.5 dB to 36.0 dB). The default
camera gain setting is 0 dB.
The camera's audio data is synchronized with video and timecode, and it is embedded in the R3D file. You can export
the audio data as separate audio files by using REDCINE-X PRO, if needed. The camera also embeds the audio in the
SDI output.
You can monitor the audio during recording and playback by using the equipped 3.5 mm stereo headphone port.
COPYRIGHT © 2021 RED.COM, LLC
955-0198, V1.1, REV. A | 82
V-RAPTOR™ 8K V V OPERATION GUIDE