Digital Alert Systems MultiPlayer User Manual
Page 9
Digital Alert Systems
MultiPlayer Quick Start Guide
Revision 4.0
Page 9 of 13
Configuring the DASDEC for MultiPlayer Audio Playout
Step 1 – Install the MultiPlayer supported software
The DASDEC must have version 2.5-1_a07 software or higher to work with the MultiPlayer. To download this version, click this
link:
www.digitalalertsystems.com/MultiPlayer_documents.html
and follow the table information to get the necessary DASDEC
software file then go to Setup > Server > Upgrade and follow standard DASDEC upgrade procedures to install this new
software version.
Once the DASDEC is upgraded with the proper software version it can be configured to control the MultiPlayer.
Step 1B – Configure the Network Interface
(Direct MultiPlayer Connection Only)
If using a direct MultiPlayer to DASDEC connection via one of the expansion
Ethernet ports you need to be sure it is enabled and configured properly.
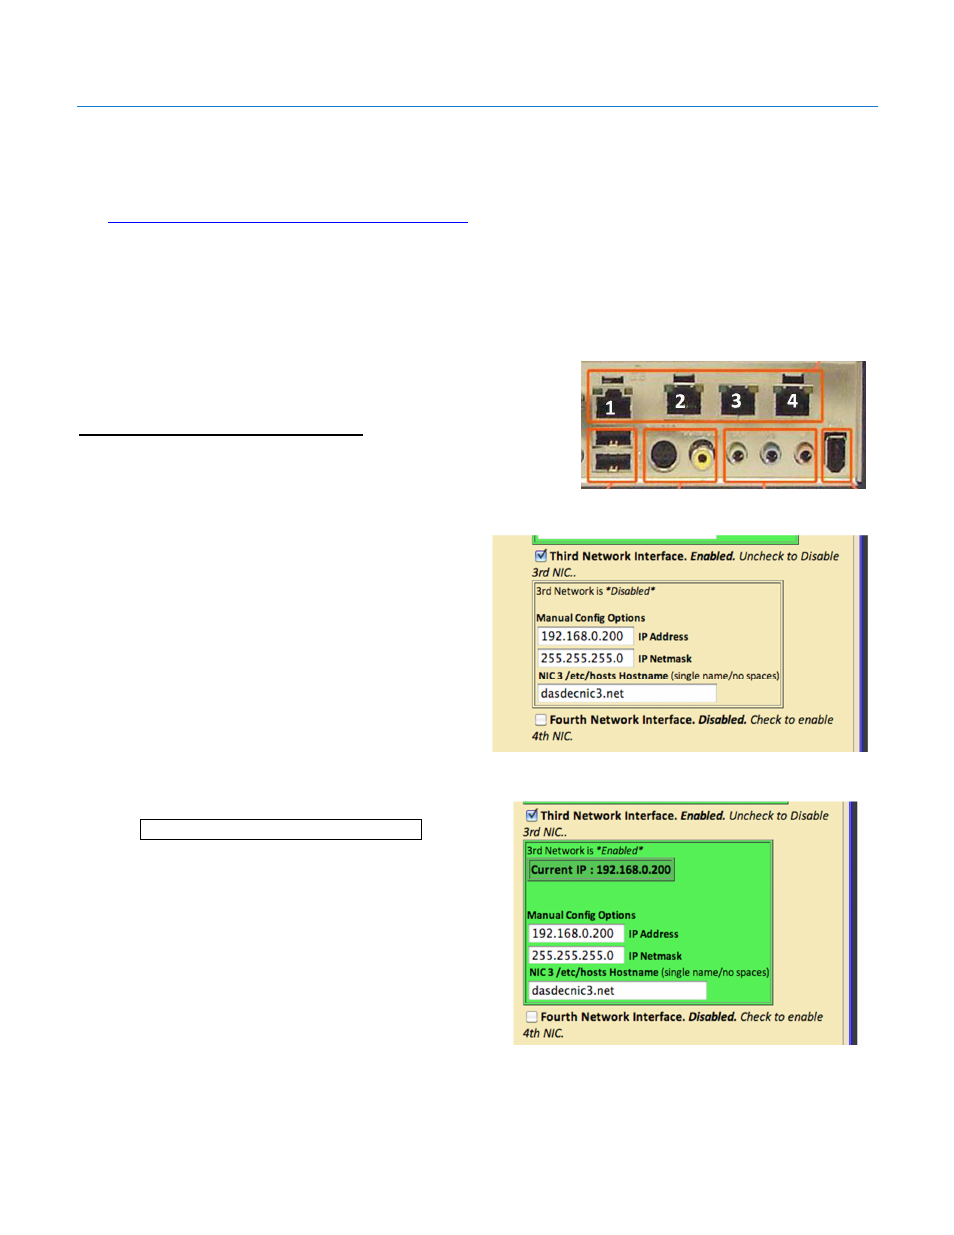
Configuring a Network Interface
1. Log In to the DASDEC
2. Go to Setup > Network > Configuration
3. Enable the proper network interface connecting the
MultiPlayer by clicking the check box. See
example in
Figure 8
using the Third
Network Interface shown
4. Enter 192.168.0.200 in the IP Address field
(or any IP address in the same range as the
MultiPlayer – DO NOT ENTER THE
MULTIPLAYER IP ADDRESS HERE)
5. Enter 255.255.255.0 in the IP Netmask field
6. Leave the Hostname field alone. It should
read dasdecnicX.net where “X” is the port
number being configured.
7. Scroll down the page and click
Accept Changes / Restart Network
8. The DASDEC will restart and the box will
change to green as shown in
Figure 9
Figure 8 Enabling Ethernet expansion port for MultiPlayer direct
connection
Figure 9 Expansion Ethernet port enabled indicated by
*Enabled* message and green outline
Figure 7 DASDEC with optional Ethernet expansion