Gauge window – the lower panels, Acquisition panel, Limit check panel – Measurement Computing eZ-TOMAS rev.11.0 User Manual
Page 12: Digital i/o panel
Gauge Window – The Lower Panels
Gauge Window, Lower Panels
Acquisition Panel
The Acquisition Panel contains one toggle switch, which determines the ON/OFF status of data acquisition.
Click this toggle switch to turn data acquisition ON (Up/Green), or OFF (Down/Red).
Limit Check Panel
The Limit Check panel contains a toggle switch and an alarm log progress bar. The Limit Check toggle
switch determines the ON/OFF status of the Limit Checking feature. Click this toggle switch to turn limit
checking ON (Up/Green), or OFF (Down/Red).
The Alarm Log Progress Bar graphically indicates how full the Alarm File is.
Double-clicking on the bar, or on its associated text, opens the Alarm Log. The log can also be accessed
from the Reports pull-down menu. The most recent alarm event will appear below the bar.
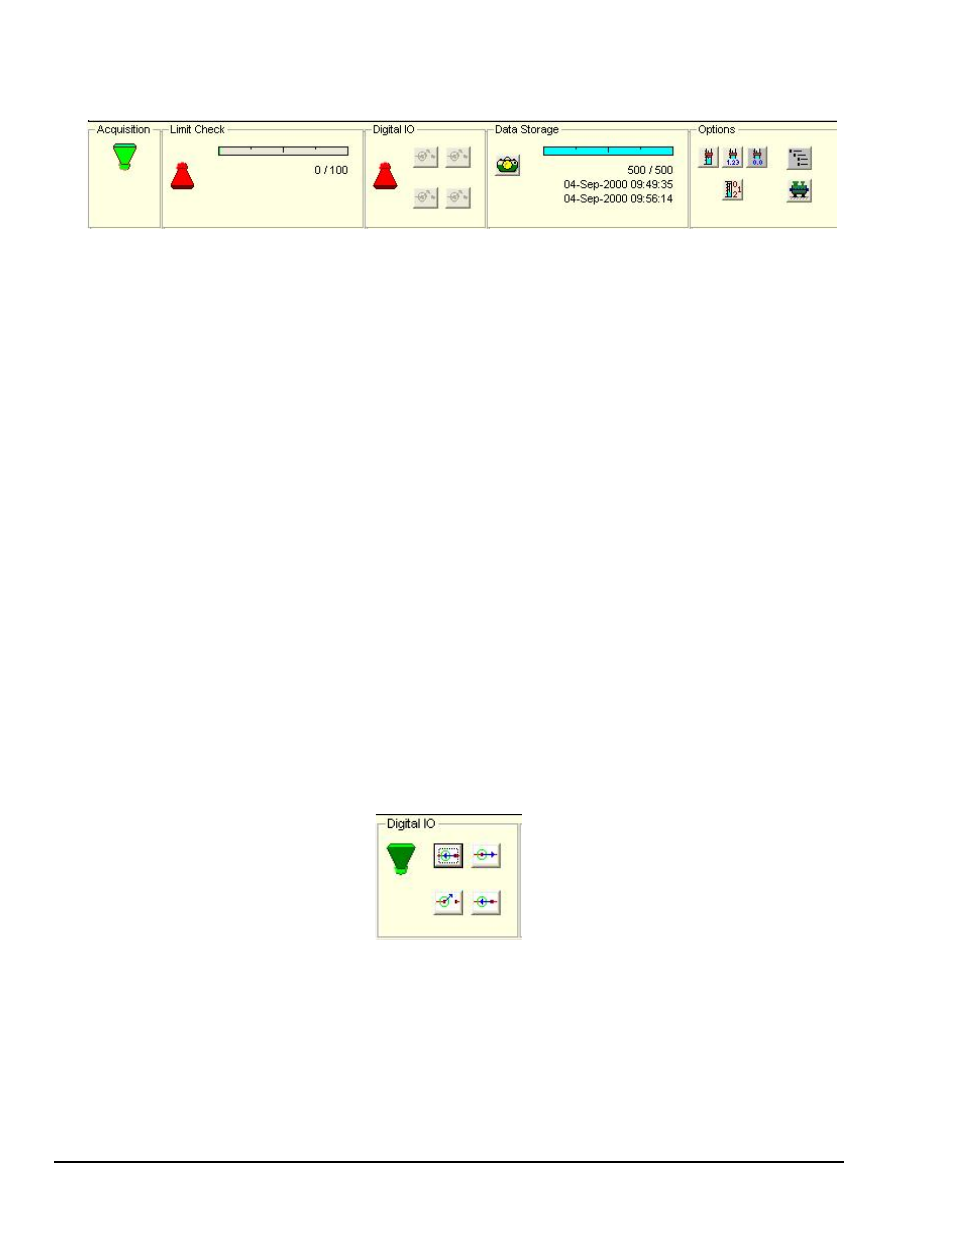
Digital I/O Panel
The Digital I/O Panel contains an ON/OFF toggle switch and four push buttons. The push button icons
indicate the current status of the digital I/O. Each time you start eZ-TOMAS, the switches will be turned
off and appear gray. The Digital I/O toggle switch must be turned “ON” to enable digital I/O functionality.
If the DIO toggle switch is turned on, Digital I/O relay switches will activate [or deactivate] depending on
the configuration set in the Digital I/O Configuration window (detailed in chapter 4). The window is
accessible via the Edit pull-menu.
During an acquisition you can manually activate each of the four switches by clicking on the associated
button.
Note that in the following figure, the Digital I/O push buttons are as follows.
Top two: Digital Input, Digital Output [Normally Closed]
Bottom two: Digital Output [Normally Opened], Digital Input.
Digital I/O Panel
The four Digital I/O button icons agree with the setup in the Digital I/O Configuration window.
1-8 Introduction
889895
eZ-TOMAS