The flashlight, The focus micrometer, The starpointer pro finderscope – Celestron Inspire 100AZ 100mm f/6.6 Alt-Az Refractor Telescope User Manual
Page 4
4
| ENGLISH
To turn on the flashlight, simply depress the rubber covered button on the back.
The flashlight was designed to be stored in the mount and can actually be used in this position. Turn on the light and it will provide a
diffused red glow onto your accessory tray, making it easy to identify your eyepieces and filters in the dark.
NOTE:
Don’t forget to turn off the flashlight when it is not in use. If you are going to store your telescope for a long period of time, it is best to remove the battery to prevent accidental corrosion.
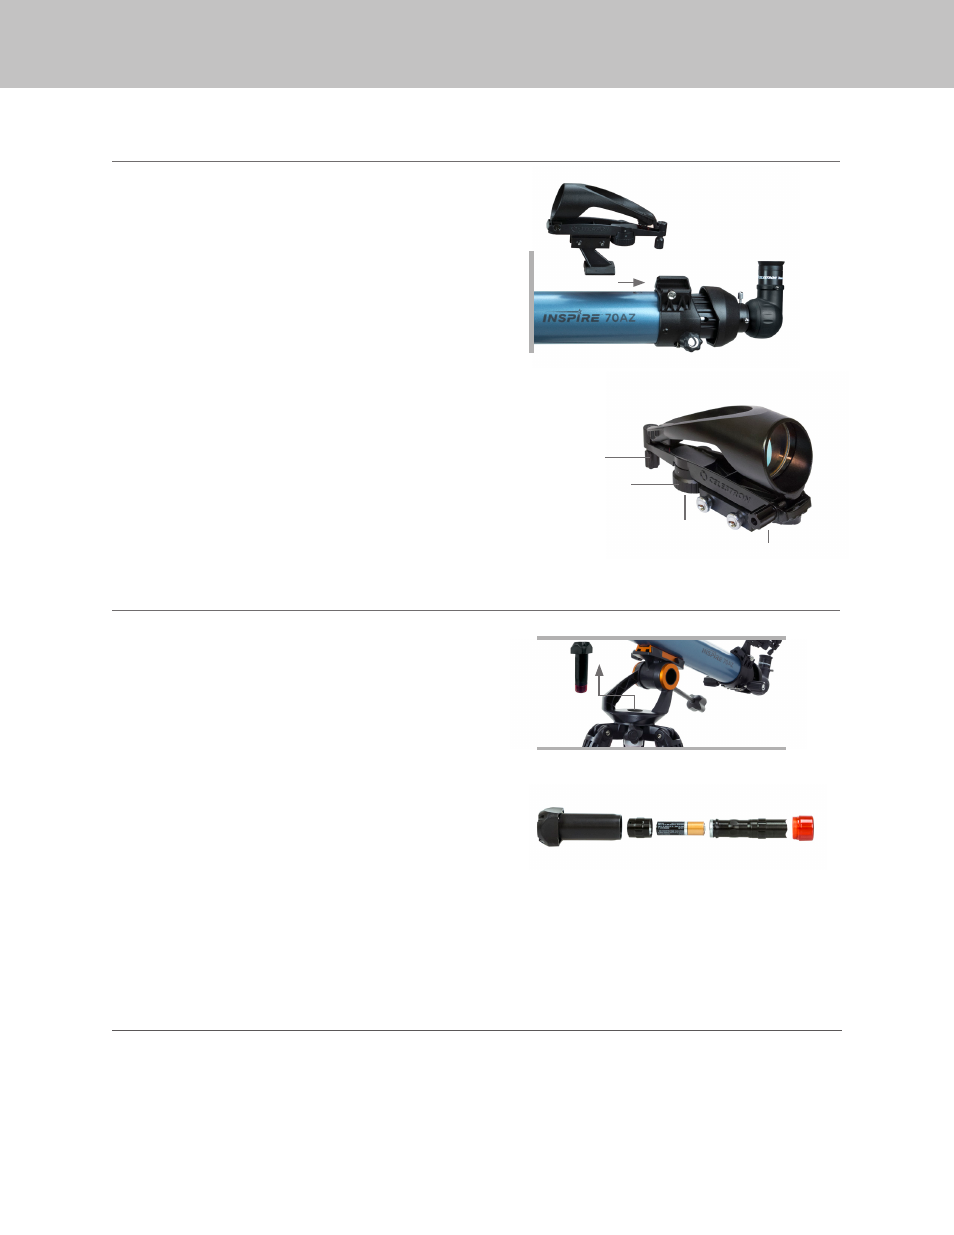
Your Inspire telescope comes with a StarPointer Pro Finderscope
that you will use as a sighting tool when aiming the telescope at
a target.
To install the finderscope:
1. Slide the finderscope bracket into the dovetail slot on the
telescope on the top of the focuser. The large window on the
finder should be facing the front of the telescope.
2. Secure the bracket by tightening the setscrew on the
dovetail slot.
The StarPointer Pro uses a CR-2032 button battery. To change
the battery, turn the StarPointer over. The battery compartment is
located in the center of the on/off/brightness switch. Use a coin
in the slot on the cover to unscrew the cap counter-clockwise until
the cap comes off. Insert the new battery with the Positive (+) side
facing upward and screw the cover back on. If your StarPointer
Pro does not immediately turn on, open the battery compartment
to remove the small plastic disk that lies between the battery
and the battery cover. This is used to prevent the battery from
accidentally discharging during shipment.
If you are going to store your telescope for a long period of time,
it is best to remove the battery to prevent accidental corrosion.
THE FLASHLIGHT
The Inspire mount comes with a built-in red LED flashlight located in
the central hub of the mount’s left and right axis. To remove it from
the mount, simply grab the top and pull straight up.
To install the single AA battery:
1. Unthread the red lens at the end of the flashlight.
2. Slide the flashlight out of its protective cover.
3. Unthread the cap on the back of the flashlight to expose the
battery compartment.
4. Insert the AA battery into the flashlight, positive (+) side first
and replace the compartment cap.
5. Slip the flashlight back into its protective housing and thread
the red lens to lock it in place.
THE FOCUS MICROMETER
Your Inspire telescope tubes come with a focus micrometer that allows you to repeatedly dial in focus for objects at different distances
quickly and easily before you even move the scope to the target. The window on the side of the focuser allows you to see a numbered
scale displaying a number from 0 to 10. The 0 on the scale represents the closest point at which you can achieve focus using the
standard eyepieces and diagonal. The 10 represents infinity focus. While astronomical objects will generally be at infinity focus, you may
wish to use the telescope to view terrestrial objects, such as bird nests or other targets at fixed distances. Once you have focused in a
terrestrial target, make a note of the number shown on the scale. The next time you observe that same target from the same observing
location, you can quickly dial the focuser to that same number and the image should be in focus when you view through the eyepiece.
THE STARPOINTER PRO FINDERSCOPE
On/off/brightness switch
Horizontal
Adjustment Knobs
Vertical
Adjustment Knobs
Battery Cover