Genee World ClassComm User Manual
Page 101
101
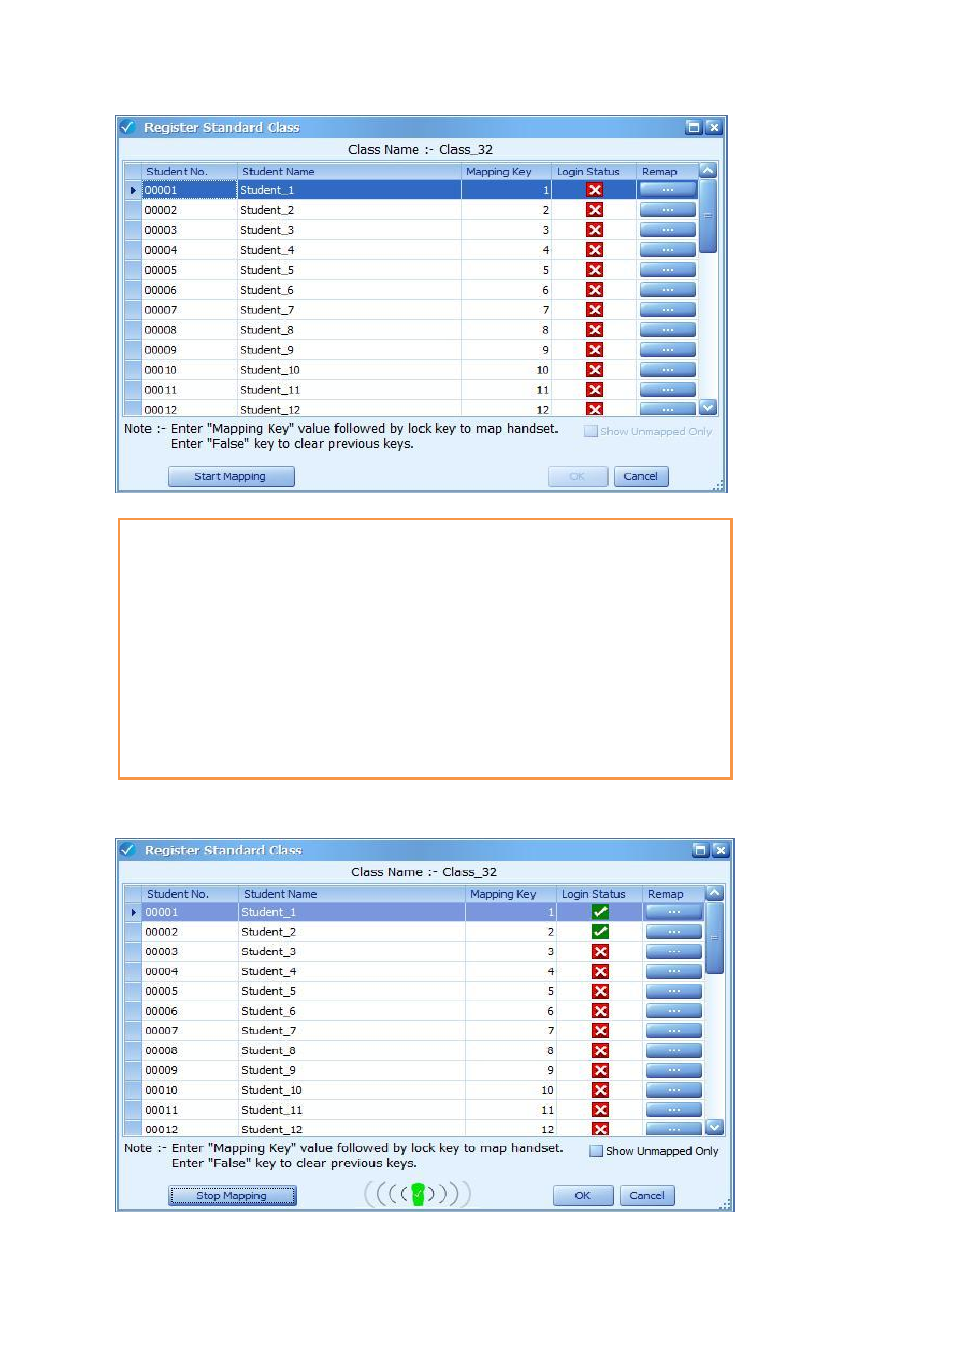
Above is the Standard Class mapping window. Click “Start Mapping” to allow students to
map their individual handsets to their name using a unique “mapping key”. Once a
student successfully maps their handset, a green tick box will appear against their name
as shown below. NOTE - If a student accidently takes up another students ID, the
presenter can press the “...” remap button to unlock the handsets and allow for correct
mapping to take place. Use the “Show unmapped only” option for larger group mappings.
After all students have successfully mapped their handset, press the “Stop Mapping”
button and then press “OK”. All successfully mapped students will transfer to the Student
Register area with “Connected” status against their names.