2 magnification, Magnification – ARRI ALEXA 35 Body & PL Mount Set (LBUS) User Manual
Page 65

Monitoring
65
25% Mask
50% Mask
75% Mask
100% Mask
Surround View area is separated from the captured image by a mask with 25% opacity.
Surround View area is separated from the captured image by a mask with 50% opacity.
Surround View area is separated from the captured image by a mask with 75% opacity.
Surround View area is separated from the captured image by a mask with 100% opacity.
Info:
Monitor Surround Mask
does not support
25% Mask
and
75% Mask
.
Info:
When setting the frame lines outside shading for a monitoring output, the Surround Mask of
the corresponding output is automatically adjusted.
14.2 Magnification
When shooting with frame lines or aspect ratios that only use a cropped area of a sensor mode the
actual image content defined by the frame line might not be displayed large enough. The magnification
setting gives the user access to a variable scaling of the monitoring outputs and sets a persistent image
magnification, so the area defined by the frame line can be displayed as large as desired. Magnification
can be adjusted in steps of 1% from 100% to 200% for the VF and the SDI outputs, individually or
globally.
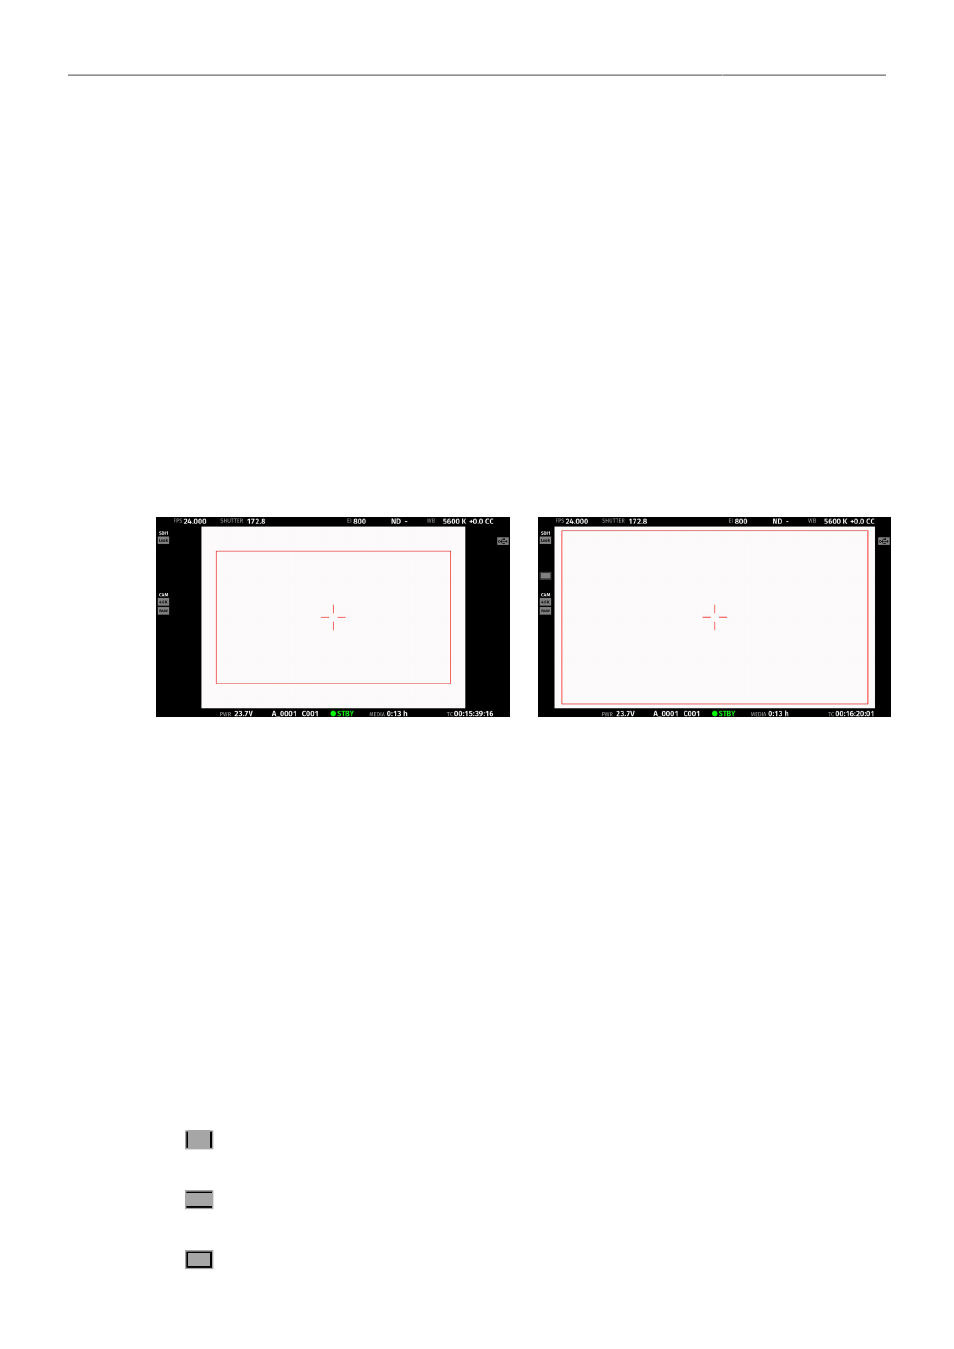
Two screen grabs from an ALEXA 35 in sensor mode
4.6K 3:2 Open Gate
with a custom 16:9 4K frame line (red rectangle) ap-
plied. The left screen shot shows the SDI 1 output without magnification applied. The right screen grab shows the SDI 1 output
with magnification applied to enlarge the image (in this example set to 130%).
► Select
MENU > Monitoring > Master Magnification
to set the magnification level for the VF outputs
and the SDI outputs simultaneously.
When individual outputs have been set to different magnification values, the Master Magnification
menu entry shows “-”. Changing the master magnification will force the magnification of all outputs
to the new value.
► Select
MENU > Monitoring > VF > Magnification
to set the magnification level for the EVF and the
Monitor.
► Select
MENU > Monitoring > SDI > SDI 1 Processing > Magnification
to set the magnification level
for the SDI 1 output.
► Select
MENU > Monitoring > SDI > SDI 2 Processing > Magnification
to set the magnification level
for the SDI 2 output.
The magnification icon on the left side of the Status Info indicates where the recorded area exceeds
the displayed image:
Indication that the recorded image content horizontally (left and right) extends beyond what
is visible on the output.
Indication that the recorded image content vertically (above and below) extends beyond
what is visible on the output.
Indication that the recorded image content horizontally and vertically extends beyond what
is visible on the output.