Deleting preset – Grass Valley EDIUS Pro v.7.0 User Manual
Page 114
Outputting Work
106
EDIUS -
User Guide
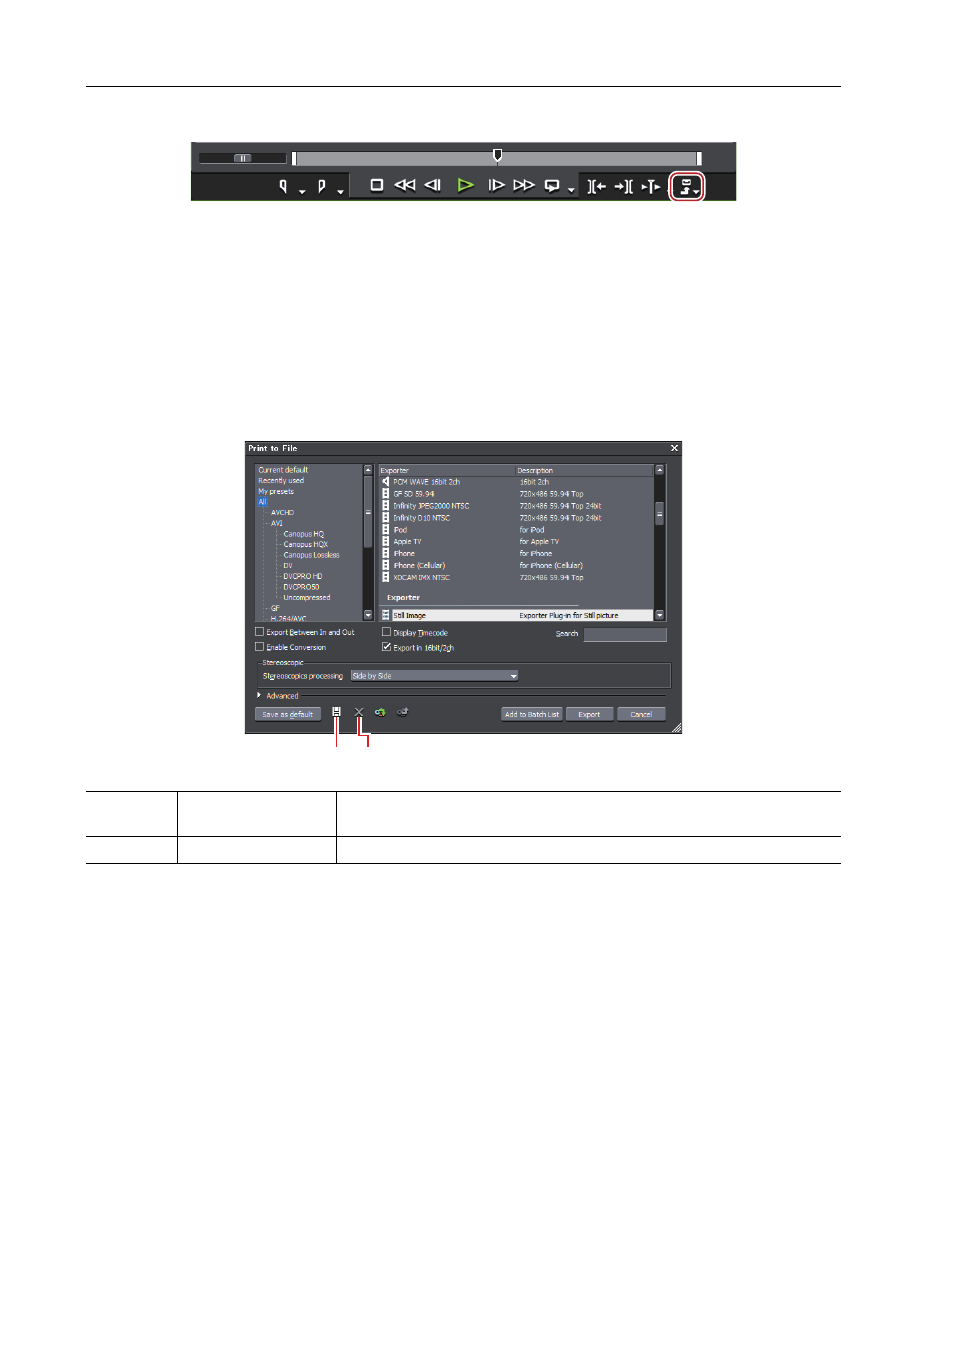
1 Click [Export] on the Recorder.
2 Click [Print to File].
The [Print to File] dialog box appears.
Exporting in File Formats
3 Select an exporter to be saved as preset.
3
•
To register the conversion settings as presets when export is performed in a different format from that of project
preset, check [Enable Conversion].
• Recently used exporters are displayed in [Recently used] in the category tree. To register a recently used export
setting as a preset, select an exporter to save from [Recently used].
4 Click [Save preset].
[Preset Dialog] appears.
5 Enter a preset name in [Preset name], and set the export details.
The export contents differ depending on the exporter.
3
•
You can enter your preferred description in [Description]. It will be displayed at the exporter/preset list in the
[Print to File] dialog box.
6 Click [OK].
The created preset is registered in the exporter/preset list.
3
•
Clicking [My presets] in the category tree displays all user-registered presets in the exporter/preset list.
• To change the settings of a created preset, select the preset to be changed, click [Save preset], and change the
settings.
Deleting Preset
0
You can delete created presets.
1 Perform steps 1 to 3 in “Creating Preset”.
Creating Preset
Select a preset to be deleted.
(1)
[Save preset]
Register the selected exporter as a preset in combination with the conversion
processing configured in [Advanced].
(2)
[Delete preset]
Delete the selected preset.
(1) (2)