Sony Multi Interface Shoe Adapter User Manual
Page 308

308
Clip Transition Operations
Chapt
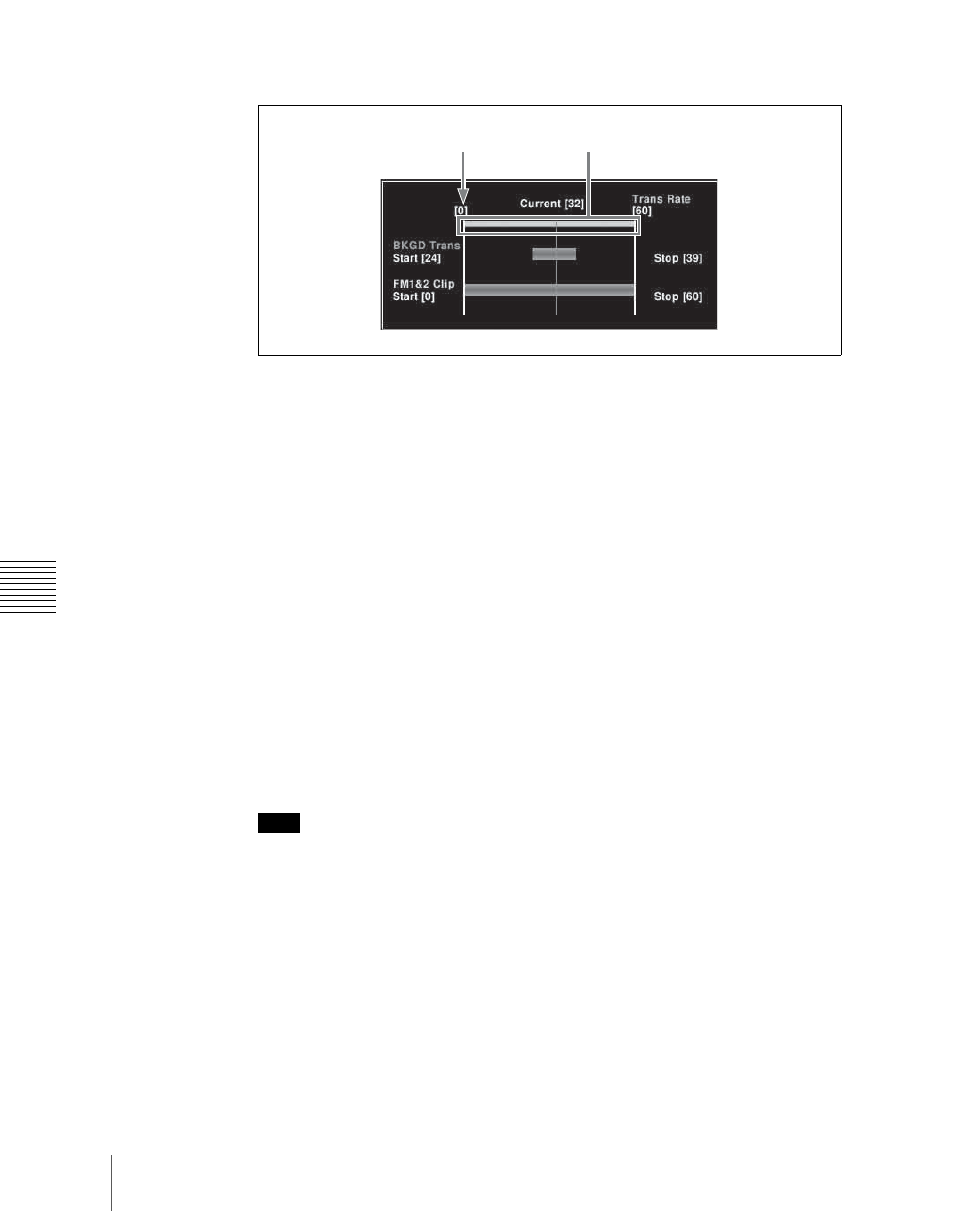
• Turn knob 1 to set the number of frames. (The left end of the reference
axis (see following figure) is the position of frame 0.)
8
Using either of the following methods, set the end point of the background
transition.
• Move the fader lever to the desired position, and in the <BKGD
Transition Set Timing> group press [Stop].
• Turn knob 2 to set the number of frames.
9
If Wipe or DME Wipe is selected in the <BKGD Transition Type> group,
in the <BKGD Transition Direction> group, select the background
transition direction.
10
In the <Select> group, press [FM 1&2 Clip].
11
Using either of the following methods, set the start point of the clip.
• Move the fader lever to the desired start point, and in the <Clip
Transition SetTiming> group press [Start].
• Turn knob 1 to set the number of frames. (The left end of the reference
axis (see following figure) is the position of frame 0.)
Note
It is not possible to set the end point.
12
In the <Clip Transition Direction> group, select the playback direction of
the clip.
To reset the start point and end point
Press [Timing Reset].
The background transition start point and end point, and the clip start point are
all reset.
Position of frame 0
Reference axis