Vivotek SD9161-H-v2 2MP PTZ Network Dome Camera User Manual
Page 80
VIVOTEK
80 - User's Manual
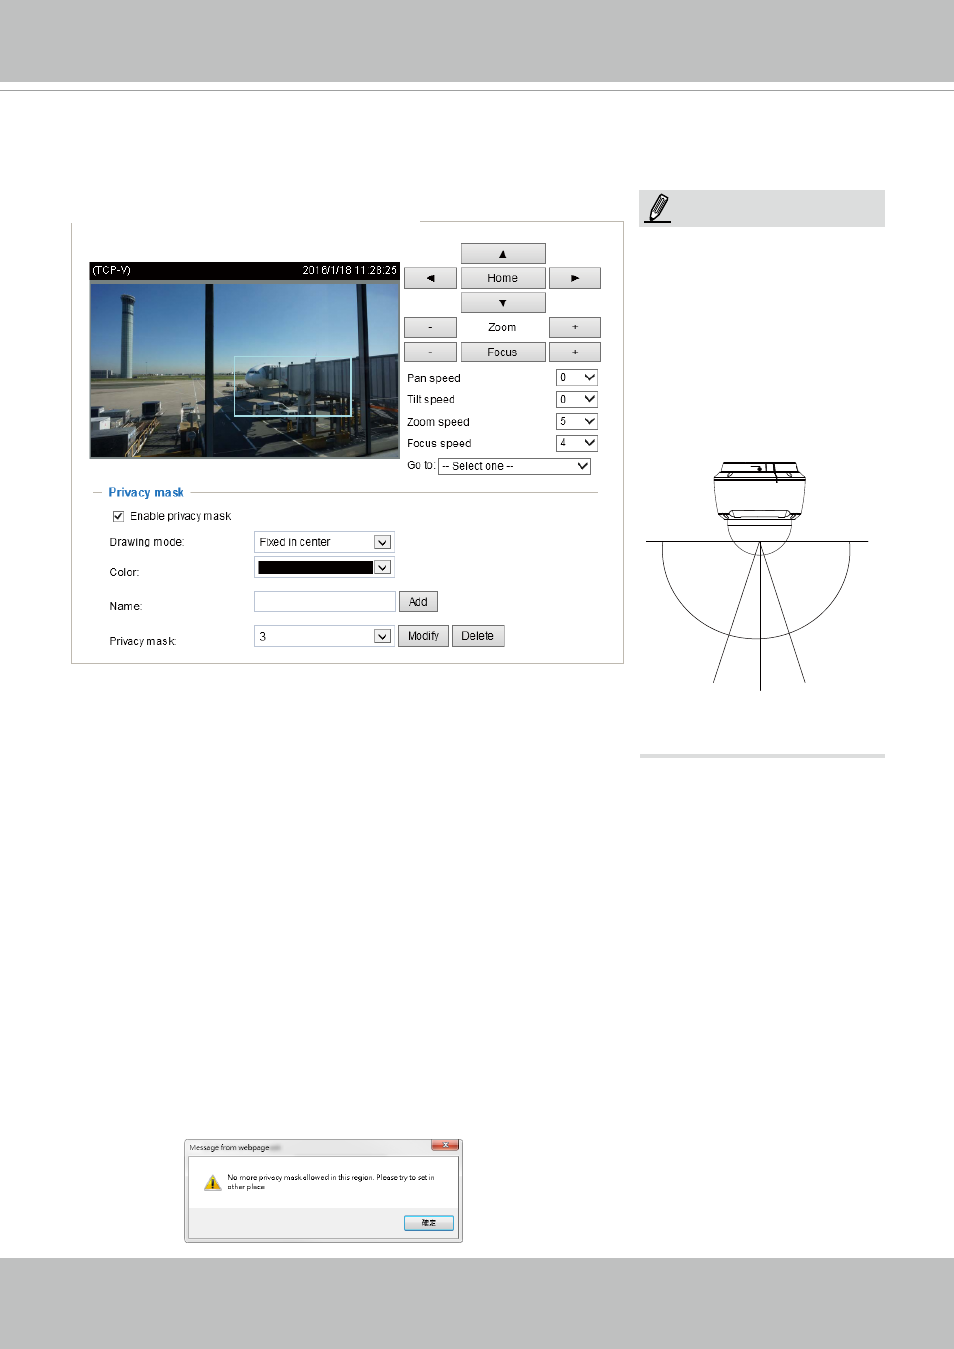
Privacy mask
On this page, you can block out sensitive view areas to address privacy concerns.
■ To set the privacy mask windows, follow the steps below:
1. Click on the
Enable privacy mask
checkbox to enable this function.
2. Use mouse clicks on the screen to move to a place where you want to create a mask. You can also
use
the PTZ panel to fine-tune the move to the target area.
3. Enter a name for the masking window. Click
Add
to create a new window.
4. Click on the
Modify
button and then use the mouse cursor to re-size the masking window, which is
recommended to be at least twice the size of the object (height and width) you want to cover. You can
select the Drawing mode as "Fixed in center" or "Drag to move."
• When using the
Fixed in center
mode, you can move to the area of your interest, and then
manually change the size and shape of the masking window.
• When using the
Drag to move
mode, you can move to an area of your interest using the PTZ
buttons above, and then click and drag to draw a masking window. The click to move maneuver
is not available when you select the Drag to move mode.
5. You can also change the color of the mask from the
Color
menu.
6. If preferred, move the field of view to other places to create more privacy masks.
You may be prompted by the message when trying to create a privacy mask at angles between +70
°
and -70
°
.
NOTE:
1. The navigation buttons here
also support the continuous
move. You can click and hold
down the button to move
across the screen until you
release the button.
2. You can not create privacy
masks at angles between
+70
°
and -70
°
.
90°
+70°
-70°
0°
0°