4 fixture icons, 5 multiple views, 1 creating a new view – LSC Lighting CLARITY LX Series v.1 User Manual
Page 100: 6 configuring a view, N 12.4
Rig
Clarity
Operator Manual
Page 90
To re-activate normal fixture selection mode click Safe (arrange) again (toggle action).
Note that the fixtures can also be aligned when not in Safe (arrange) mode.
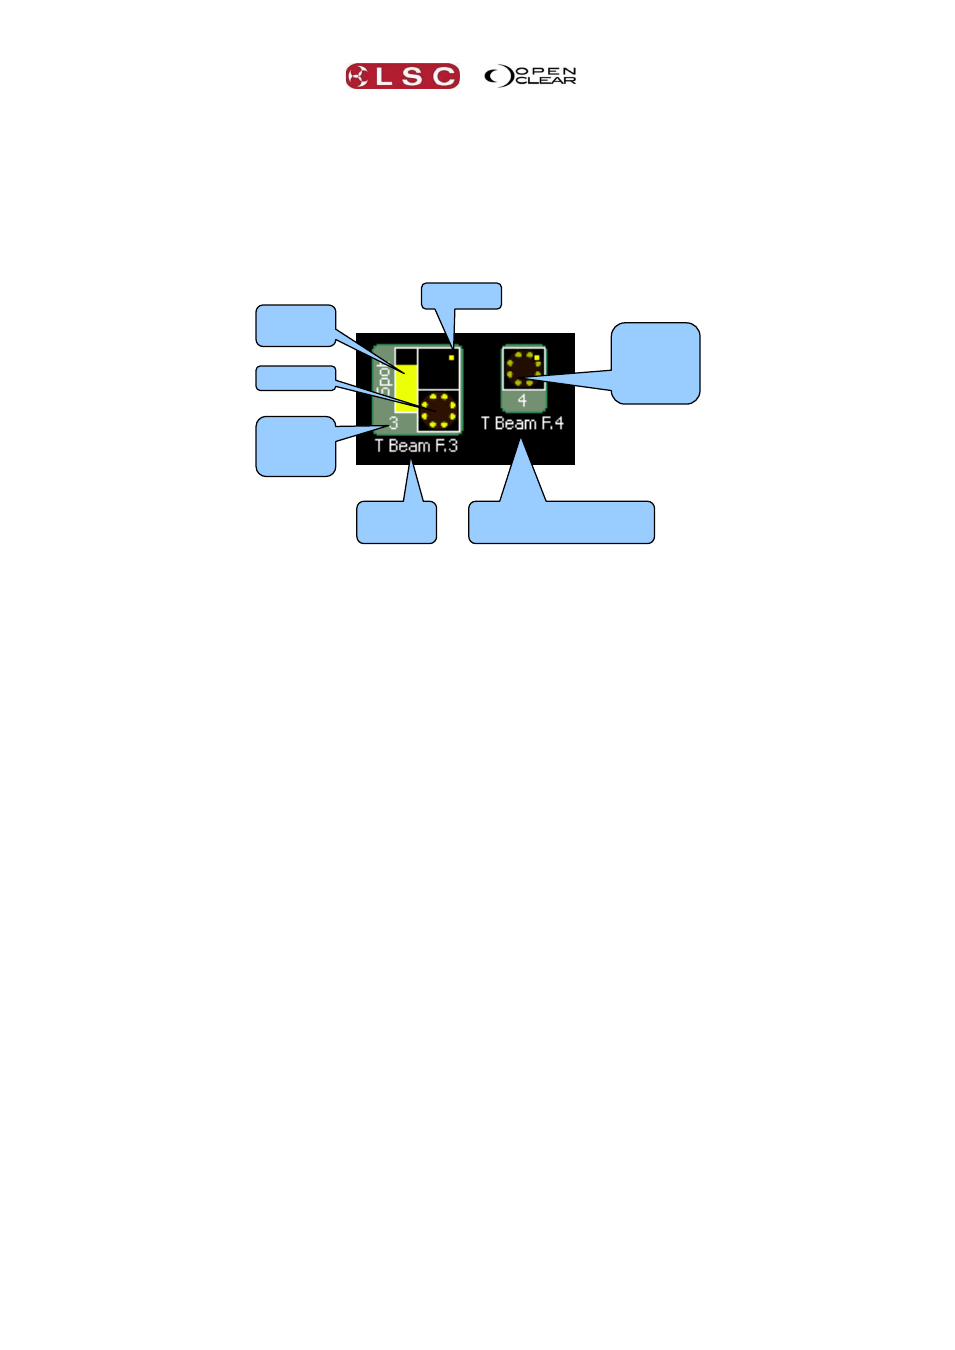
12.4 FIXTURE ICONS
Two different styles of icons are available for displaying fixtures:
Detailed. Separate areas for Intensity/Colour, Position and Beam are shown.
Combined/Compact. All attributes combined into a compact display.
Fixture icons can be individually set by selecting the fixture(s) and right clicking then selecting
either Detailed or Combined/Compact.
You can also choose which type of icon will be used as the default icon for each view in the
“Configure View” dialogue described below.
The “Fixture Unit Number” displayed in the icon is the fixture’s number used in command line
programming.
Screen size can be varied with the – , + and 100% or fit (to screen) buttons on the menu bar.
It can also be zoomed with the mouse wheel.
12.5 MULTIPLE VIEWS
You can create multiple views. In each view you can name the view, delete or add fixtures and
groups, change the arrangement of the fixtures and groups, display the fixtures as either
“detailed” icons or “combined/compact” icons and select a different background image.
For example:
A “Stage View” might show a plan of the stage with the stage fixtures positioned on the
lighting battens. A “FOH View” might show a plan of the auditorium with of the Front Of
House fixtures in their positions around the auditorium.
In a television studio, the selection of fixtures can be greatly simplified by creating an
individual view for each set or performance area that only contains the fixtures to be
used in that set.
12.5.1 Creating a new View
To add a new view click either:
Add View (opens a new blank view without any fixtures) or:
Copy View (creates a copy of the currently selected view that you can configure to your
requirements.
To delete a view, select that view by clicking on its name tab then click “Del View” from the menu
bar.
12.6 CONFIGURING A VIEW
When a view has been selected (by clicking on its name tab), that view can be configured by
either clicking Configure on the menu bar or right clicking in the view pane and selecting
“Configure View”. This opens the “Rig Schematic View Settings” dialogue…..
Intensity
+ Colour
Beam
Position
Intensity
+ Colour
+ Beam
+ Position
Detailed
Icon
Combined/Compact
Icon
Fixture
unit
number