1 background image, 7 selecting fixtures in rig view – LSC Lighting CLARITY LX Series v.1 User Manual
Page 101
Clarity
Rig
Operator Manual
Page 91
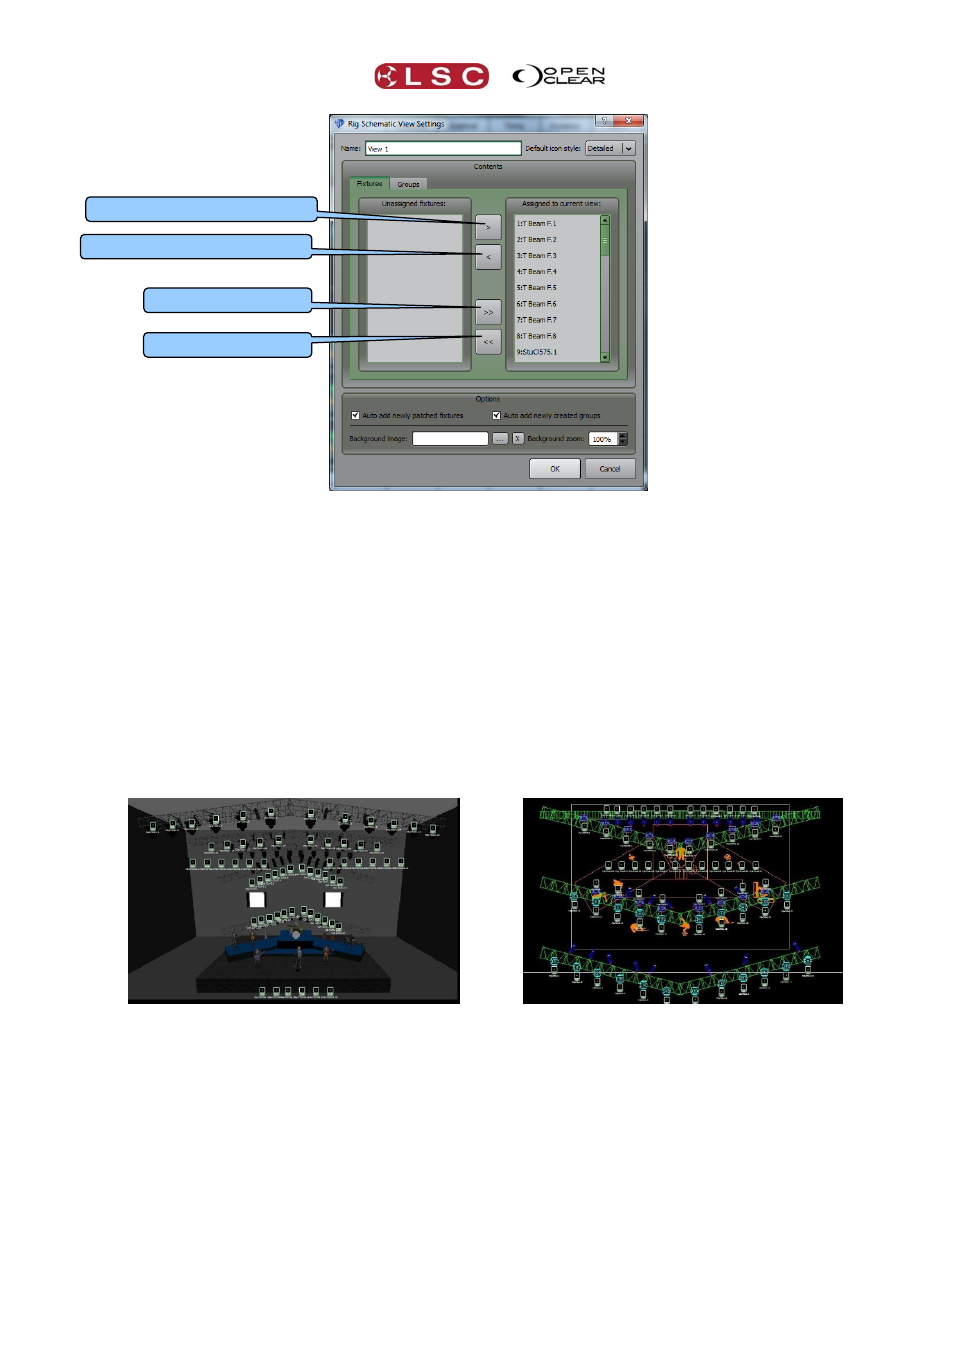
The “Contents” pane allows you to select either Fixtures or Groups tabs and then make you
selection by clicking on the fixture or group names. You can then assign or un-assign them
from the current view by clicking on the arrow buttons.
At the top you can enter a name for the view and also select the type of fixture icon to be used
as the default icon for this view.
The options pane allows you to “Auto add newly patched fixtures” and “Auto add newly created
groups”.
12.6.1 Background Image
At the bottom of the “Rig Schematic View Settings” dialogue (above) you can select and load a
background image over which your fixtures will be displayed. Click on the … button and
navigate to your image. The “Background zoom” controls allow you to scale your image to suite
you screen size on the rig view. To remove a background image click on the X button.
Examples of Rig mode with background image.
Note: When media is added to Clarity from elsewhere (audio files, images/movies, rig
backgrounds), Clarity automatically adds it to the Clarity media folder.
12.7 SELECTING FIXTURES IN RIG VIEW
Fixtures to be programmed can be selected by clicking on them. Selected fixtures have a blue
border. Click again to de-select a fixture.
If you click on a fixture then drag over multiple fixtures, Clarity draws a line showing the drag
path and selects each fixture that you drag over.
Un-assign All
Assign All
Un-assign Selected
Assign Selected