Delete one or all dynamic dhcp bindings – NETGEAR M4350-24F4V 24-Port 10G SFP+ Managed AV Network Switch User Manual
Page 135
3. Click the Main UI Login button.
The main UI login page displays in a new tab.
4. Enter admin as the user name, enter your local device password, and click the Login
button.
The first time that you log in, no password is required. However, you then must
specify a local device password to use each subsequent time that you log in.
The System Information page displays.
5. Select System > Services > DHCP Server > DHCP Bindings Information.
The DHCP Bindings Information page displays. The table displays information about
all bindings.
6. To search for a binding by IP address, enter the IP address in the Search Binding
IP field and click the Go button.
Information about the binding displays.
The following table describes the view-only fields on the page.
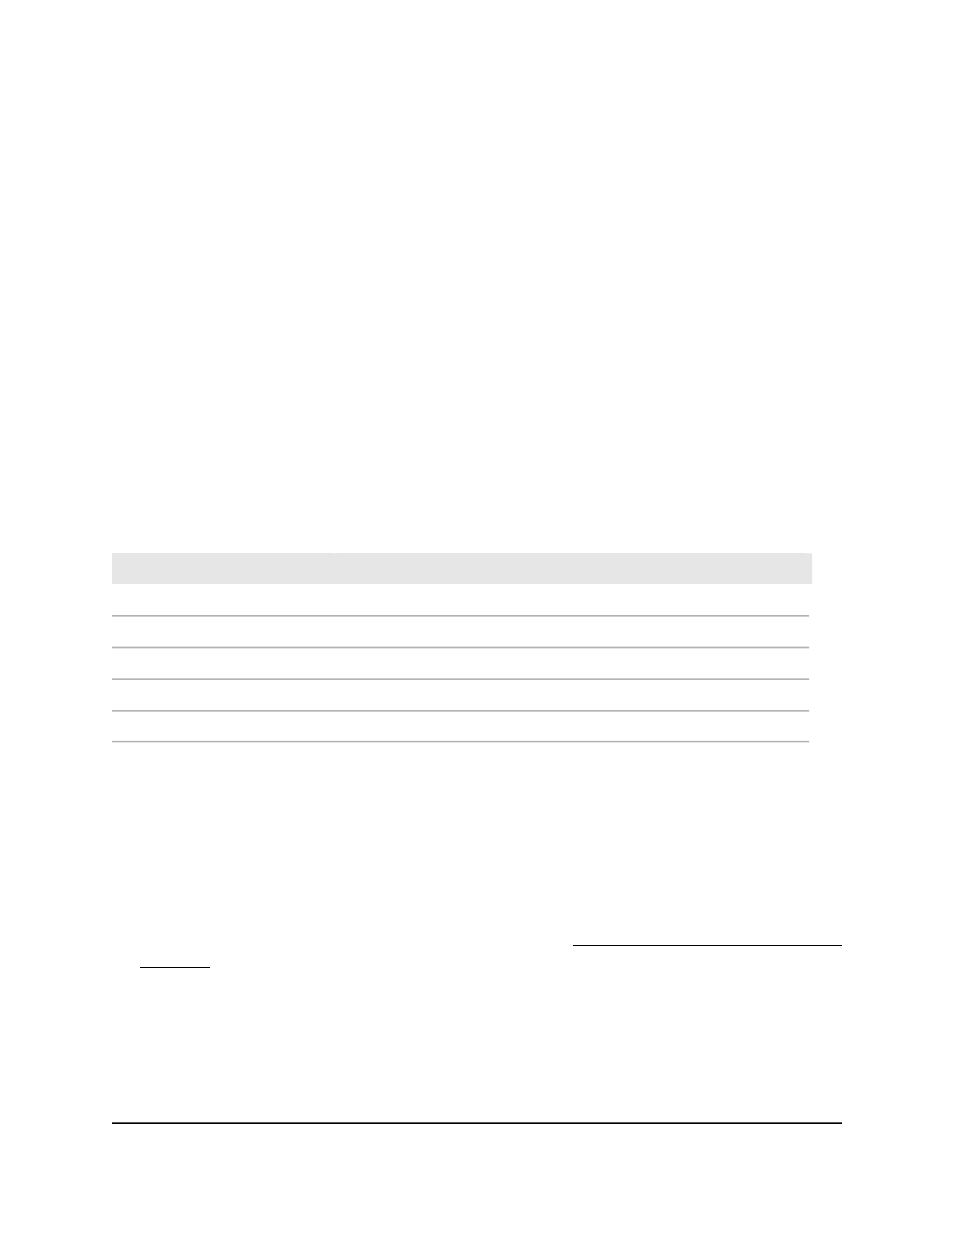
Table 34. DHCP bindings information
Description
Field
The client’s IP address
IP Address
The name of the pool that the client is part of
Pool Name
The client’s hardware address
Hardware Address
The remaining lease time in days, hours and minutes (dd:hh:mm format)
Lease Time Left
The type of binding (Dynamic or Manual)
Type
Delete one or all dynamic DHCP bindings
To delete one or all dynamic DHCP bindings:
1. Launch a web browser.
2. In the address field of your web browser, enter the IP address of the switch.
If you do not know the IP address of the switch, see Log in to the main UI with a web
browser on page 27 and the subsections.
The login page displays.
3. Click the Main UI Login button.
The main UI login page displays in a new tab.
4. Enter admin as the user name, enter your local device password, and click the Login
button.
Main User Manual
135
Configure Switch System
Information
Fully Managed Switches M4350 Series Main User Manual