Step 4: connecting to telephone line(p. 93) – Canon imageCLASS MF753Cdw Multifunction Wireless Color Laser Printer User Manual
Page 103
●
You can also configure the setting to receive faxes automatically after the machine rings for a certain
period of time. [Switch to Auto RX](P. 553)
4
Press [Apply].
➠
The [Connect Telephone Line] screen is displayed.
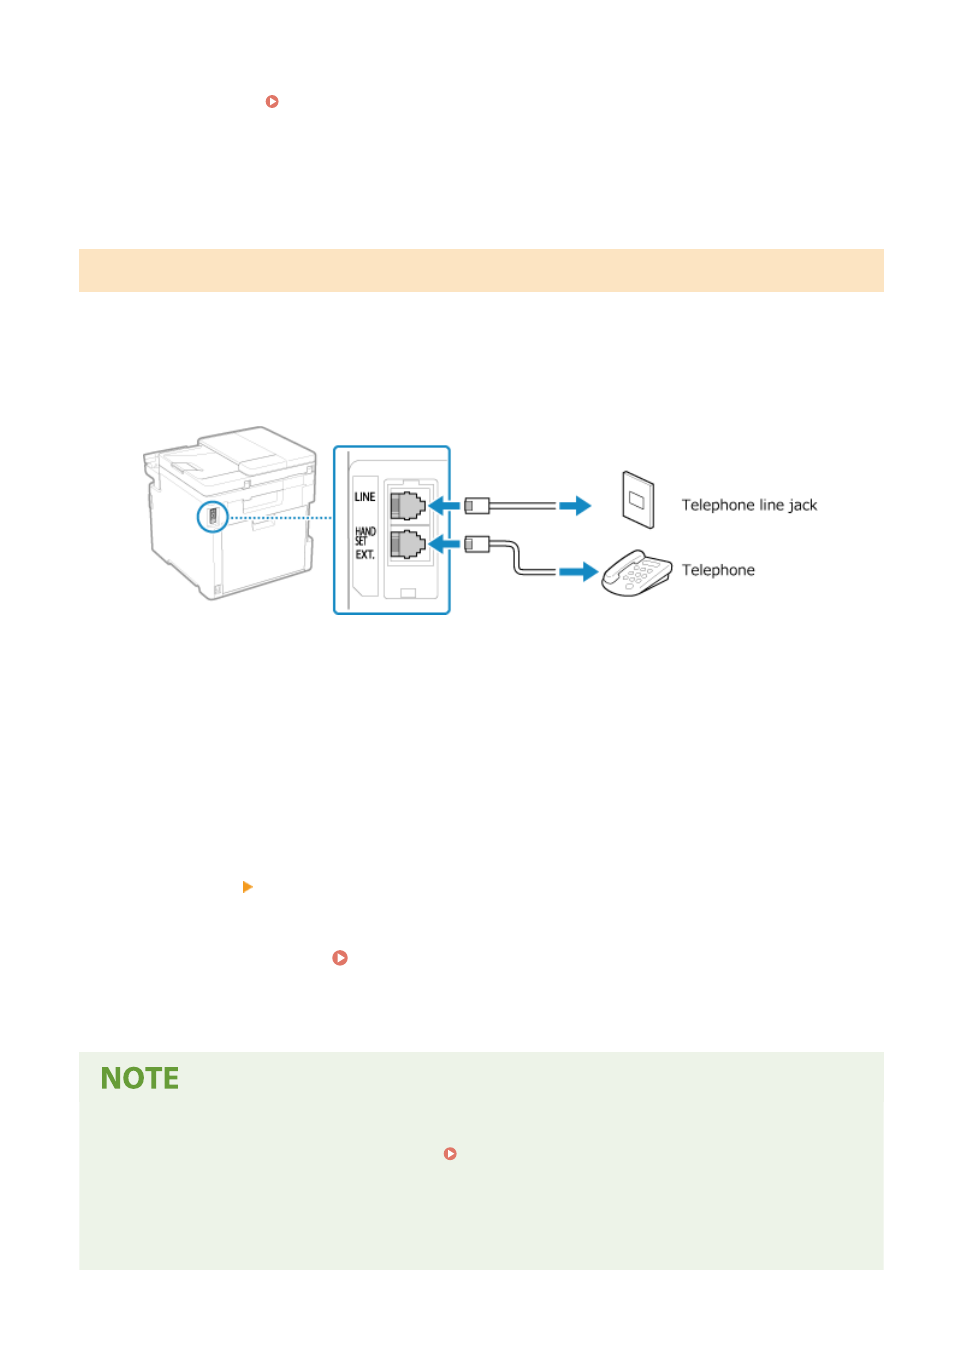
Step 4: Connecting to Telephone Line
Use the supplied telephone cord to connect the machine to the telephone line.
When using a telephone, connect it to the machine.
1
Connect the supplied telephone cord to the telephone line jack (LINE) on the
machine and the telephone line connector on the wall.
Connect the handset or telephone to the external telephone jack (EXT.) on the machine.
●
When connecting a telephone with fax function, be sure to disable the fax auto receive setting on the
telephone.
●
Depending on the type of telephone connected to it, the machine may not be able to send or receive faxes
properly.
2
On the [Connect Telephone Line] screen, press [End].
➠
The screen confirming that you want to exit the Fax Setup Guide is displayed.
3
Press [Yes] [OK].
4
Restart the machine. Restarting the Machine(P. 104)
➠
The settings configured in the Fax Setup Guide are applied, and the type of telephone line is configured
automatically.
If the Type of Telephone Line Is Not Configured Automatically
●
Configure the type of telephone line manually. [Select Line Type](P. 545)
* If you do not know the type of your telephone line, contact your telephone company.
Making an Alert Sound When the Handset Is Not Properly Set on the Cradle
●
You can select whether the machine makes an alert sound when the handset of a telephone connected to
the machine is not properly set on the cradle.
Setting Up
93