Canon imageCLASS MF753Cdw Multifunction Wireless Color Laser Printer User Manual
Page 624
1
On the operation panel, press [Menu] in the [Home] screen. [Home] Screen(P. 111)
2
Press [Adjustment/Maintenance] [Adjust Image Quality] [Auto Adjust Gradation]
[Adjust Copy Image].
➠
The available paper sizes and types are displayed on the confirmation screen.
3
Check that available paper is loaded, and then press [OK].
➠
The [Steps] screen is displayed.
4
Check the operating procedure, and press [Start].
➠
The calibration image is printed.
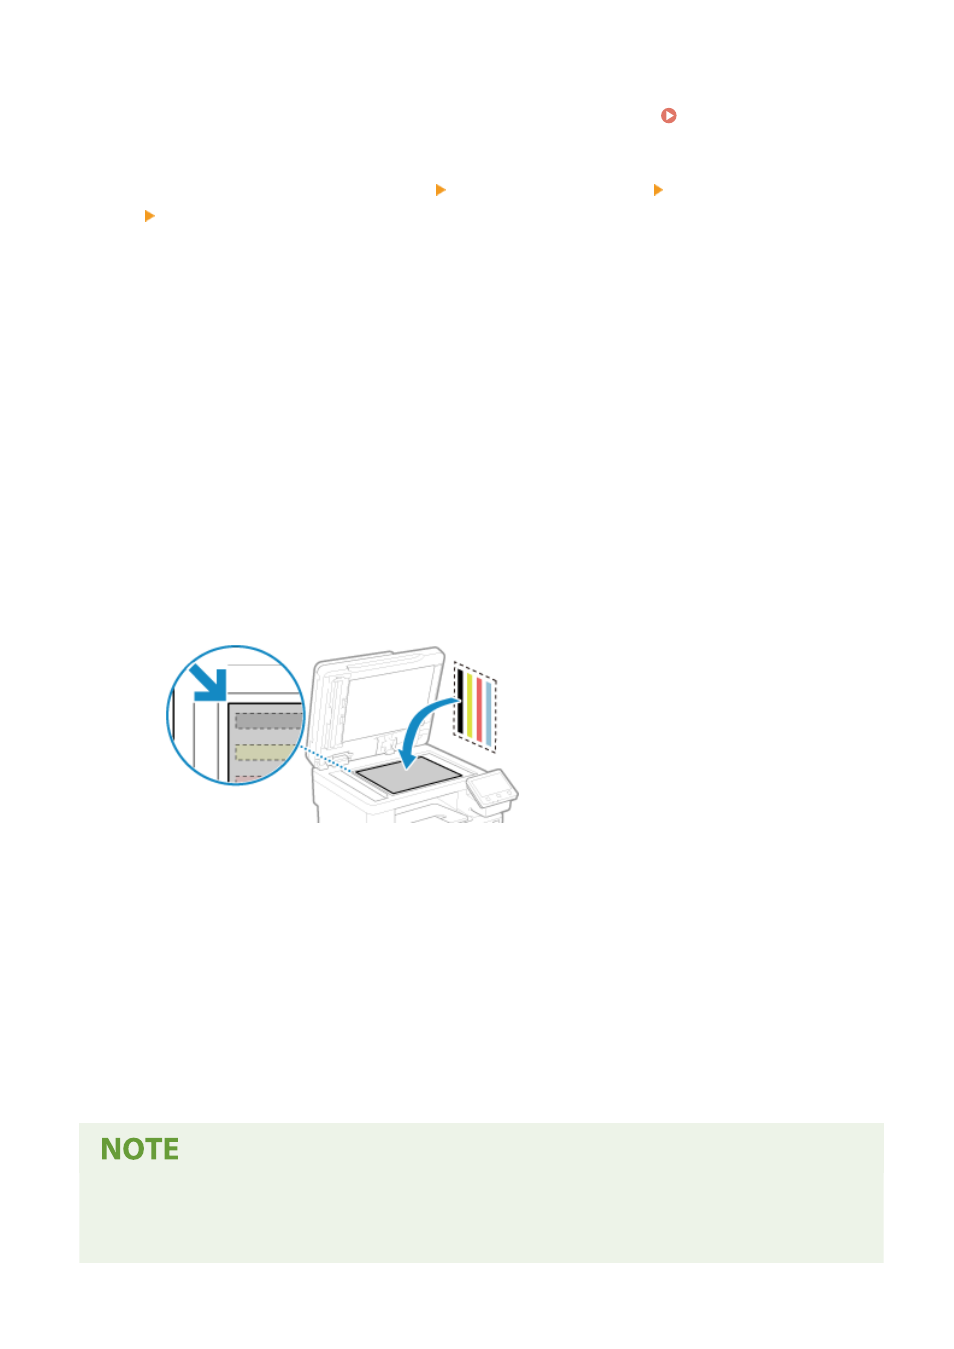
5
Place the paper with the correction image printed on the platen glass.
1
Open the feeder.
2
Place the paper on the platen glass in the landscape orientation while aligning the corner of the paper
with the top left corner of the platen glass.
Place the print side of the correction image face down with the black band at the back of the machine.
3
Gently close the feeder.
6
Press [Start Scanning].
➠
The calibration image is scanned, and calibration is performed.
When calibration is completed, the message [Finished.] appears, and then the [Auto Adjust Gradation]
screen is displayed.
7
Remove the paper with the printed correction image from the platen glass.
When [Could not perform correction.] Appears
●
Check that operations are performed with the procedure above. In particular, check the following:
- In 3, check that available paper is loaded in the paper drawer.
Maintenance
614